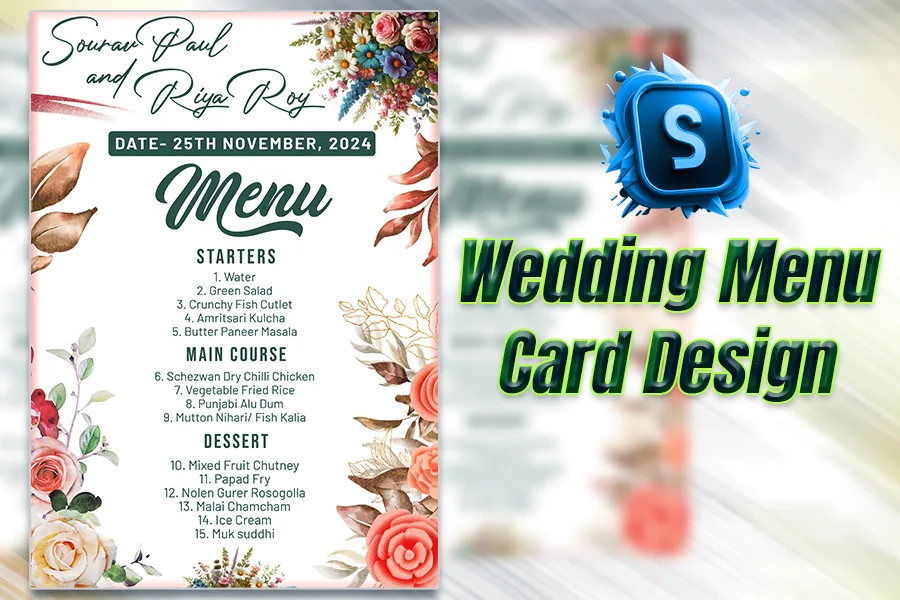
A wedding table menu card is more than just a food list—it reflects your wedding style and a lovely detail that enhances your guests’ experience. Designing one yourself can add a personal touch to your big day while keeping things budget-friendly. Follow this simple tutorial to create a professional-looking wedding menu card, even if you’re a beginner!
Start by choosing the best format for your wedding theme and table setup. Here are some popular options. Perfect for minimalist designs, typically A5 or A6 in size. Stand on the table for better visibility. Add a vellum overlay for a layered, elegant look. Pro Tip: Choose a size that fits seamlessly with your table decor without taking up too much space.
Use a solid color, gradient, or texture for the base. For a floral theme, import floral graphics or download free PSD backgrounds from sites like Festybay. Adjust opacity or apply a blur effect for a subtle look. Use the Gradient Tool to blend colors for a dreamy effect.
Use the Text Tool (T) to write your title. Example “Emma & Liam’s Wedding Menu.” Select a script font (e.g., Allisya or Mistral) for elegance. Add a subtle drop shadow or gold gradient to make it stand out. Use layer styles (right-click on the text layer > Blending Options) to add effects like bevels or embossing.
Divide the menu into sections (e.g., Starters, Main Course, Desserts). Use clean, readable fonts like Georgia or Open Sans for the body text. Add spacing between sections for clarity. For each dish, write a short description. Example: Caprese Salad – Fresh mozzarella, basil, and tomatoes.
Add borders or floral accents using the Shape Tool or pre-made vectors. Use brushes for custom flourishes or swirls. If your theme is minimalist, a clean line divider may suffice.
Add a Thank-You Note: Place a small thank-you message at the bottom, like: “Thank you for celebrating our special day with us.” Use the Align Tool to ensure your design looks balanced. Use Hue/Saturation to tweak colors to perfection.
Save your design as a PSD for future edits. Export a print-ready file> Click File > Save As. Select PDF or JPEG with maximum quality settings.
Save your design as a PSD for future edits. Export a print-ready file> Click File > Save As. Select PDF or JPEG with maximum quality settings.
Use textured or premium cardstock for an elegant finish. Based on your style, opt for a matte or glossy lamination. If possible, test print one card to ensure the colors and alignment look perfect.
Designing a wedding menu card in Photoshop allows you to craft something unique and personal. Whether your style is rustic, modern, or luxurious, Photoshop has the tools to bring your vision to life. 💡 Download Free Wedding Menu Card Templates at Festybay to jumpstart your design process!
Start designing today, and let your creativity shine on your special day!
| Software Compatibility | Adobe Photoshop |
| Printable | Yes |
| File Format | PSD (Photoshop) |
| File size | 150 MB |
| Dimensions | 6 x 9 inches |
| Color Mode | CMYK |
| Resolution | 300 DPI |
| Download file type | rar file |
| PSD Type | Only psd |
| Mockup | No |
| License | Free for personal and commercial use |
Copyright Disclaimer:: You are welcome to use these templates for personal or business purposes, but giving credit to Festybay is mandatory. If you believe that any content violates your copyright, please contact us at contact@festybay.com or reach us on WhatsApp at +91-8637840669. We will take prompt action to remove the content in question.
Table of Contents
Toggle